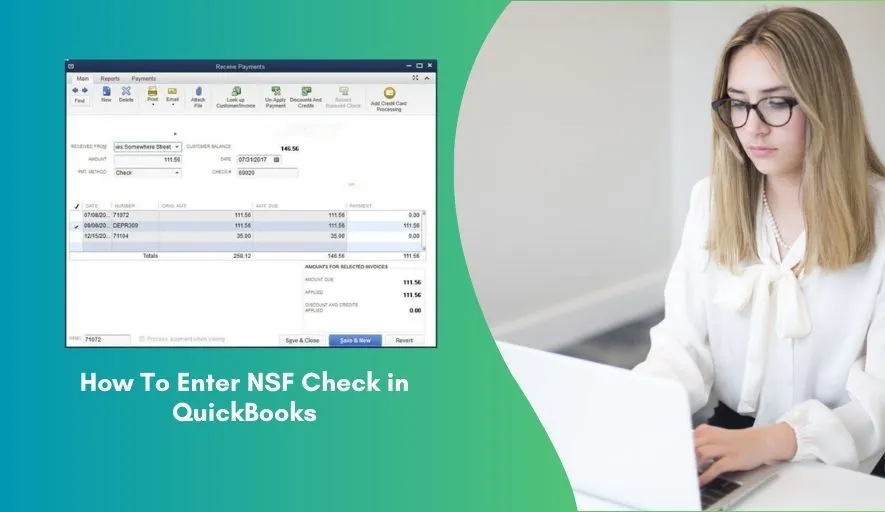
As a small business owner or accountant, it’s crucial to keep track of your finances accurately. One of the most common transactions you may encounter is a check returned due to insufficient funds (NSF). QuickBooks is a powerful accounting software that can help you manage your financial transactions, including handling NSF checks. In this post, we’ll walk you through the step-by-step process of entering an NSF check in QuickBooks.
Why Accurate NSF Recording Matters
Before we dive into the “how,” let’s quickly cover the “why”:
1. Accurate Cash Balance: Your bank account balance needs to reflect the actual funds available.
2. Correct Accounts Receivable: You need to show that the customer still owes you money for the original invoice (plus any new fees).
4. Proper Expense Tracking: Record the fees your bank charges you as a legitimate business expense.
4. Audit Trail: Maintain a clear record of the bounced check for future reference and financial reporting.
5. Bank Reconciliation: Make your monthly bank reconciliation process smooth and headache-free.
What You’ll Need Before You Start
Gather the following information to make the process easier:
- Original Check Amount: The amount of the bounced payment.
- Customer Name: Who issued the bounced check.
- Check Number: The number of the bounced check (if available).
- Date of NSF: The date the bank notified you or the transaction appeared on your statement.
- Your Bank’s NSF Fee: The amount your bank charged you for the returned item.
- Your Business’s NSF Fee (if applicable): The fee you plan to charge the customer for the bounced check (check your state laws and business policy).
Step-by-Step Guide: Entering an NSF Check in QuickBooks
We’ll break this down into three main actions: recording your bank’s fee, reversing the original payment, and creating a new invoice for the customer (including your fee).
Step 1: Record Your Bank’s NSF Fee
First, account for the fee your bank charged you.
1. Go to your Chart of Accounts: (Lists > Chart of Accounts or Company > Chart of Accounts).
2. Locate your Bank Account: Double-click on the bank account into which the original payment was deposited. This will open the bank register.
3. Enter the NSF Fee:
- Date: Enter the date the NSF fee hit your bank account.
- Number: You can leave this blank or type “NSF Fee.”
- Payee: Enter your bank’s name.
- Account: Select an expense account, typically “Bank Service Charges” or “NSF Fees Expense.” If you don’t have one, create a new “Expense” account for “Bank Service Charges.”
- Memo: Add a clear memo like “NSF Fee for [Customer Name] – Check #[Original Check Number].”
- Payment: Enter the fee amount as a negative number in the “Payment” column (or a positive number if using the “Checks” or “Expenses” window).
4. Record: Click “Record” or press “Enter.”
This step ensures your bank balance is accurate and the fee is recorded as an expense.
Step 2: Reverse the Original Payment
Now, we need to effectively “undo” the original payment that was never actually received and put the money back onto the customer’s outstanding balance. The most robust way to do this for audit purposes is with a General Journal Entry.
1. Go to Make General Journal Entries: (Company > Make General Journal Entries).
2. Date: Use the date your bank notified you of the NSF or the date the funds were removed from your account.
3. Enter the Journal Entry:
Line 1:
- Account: Select “Accounts Receivable.”
- Debit: Enter the original bounced check amount.
- Name: Crucially, select the Customer’s Name from the dropdown list. This ensures the amount is linked to their A/R balance.
- Memo: “NSF Reversal – Original Check #[Original Check Number] from [Customer Name].”
Line 2:
- Account: Select your Bank Account (the one where the check was initially deposited).
- Credit: Enter the original bounced check amount.
- Memo: (Optional, will usually auto-fill from Line 1)
4. Save: Click “Save & Close.”
This journal entry increases the customer’s Accounts Receivable balance (showing they still owe you) and decreases your bank account balance (reflecting the returned funds).
Step 3: Create a New Invoice for the Customer
Finally, you’ll create a new invoice for the customer for the original amount, plus any NSF fee you charge them.
1. Go to Create Invoices: (Customers > Create Invoices).
2. Customer: Select the customer who issued the bounced check.
3. Date: Use the current date or the date you are rebilling them.
4. Add Items to the Invoice:
Line 1 (Original Debt):
- Item: If you had an original invoice, you might choose the same service/product item. Alternatively, you can create a new “Other Charge” item named “Returned Check Amount” linked to an Income account.
- Description: “Original payment for Invoice #[Original Invoice Number] – Returned Check #” or similar.
- Amount: Enter the original bounced check amount.
Line 2 (Your NSF Fee):
Item: Create a new “Service” or “Other Charge” item called “NSF Fee” or “Returned Check Fee.” Link this item to an “Other Income” account (Lists > Item List > New Item).
Description: “Returned Check Fee for Check #[Original Check Number].”
Amount: Enter the fee you are charging the customer.
5. Memo: Add a clear memo stating “This invoice includes the original outstanding balance plus a returned check fee.”
6. Print/Email and Send: Send this new invoice to your customer.
Important Considerations & Best Practices
- Communicate Promptly: Contact your customer immediately to inform them of the bounced check and the new invoice.
- State Laws: Be aware of your state’s laws regarding charging NSF fees to customers. Some states have limits or specific notification requirements.
- Bank Reconciliation: When you reconcile your bank statement, the bank’s NSF fee and the reversal of the original deposit will now be available to clear.
- Prevent Future NSFs: Consider requiring upfront payments, using ACH or credit card payments, or setting up payment reminders for habitually late payers.
- Consult Your Accountant: If you have a complex scenario or are unsure about any steps, always consult with your accountant or bookkeeper.
Conclusion
Entering an NSF check in QuickBooks is a straightforward process that helps you maintain accurate financial records. By following these steps, you’ll be able to manage your NSF checks efficiently and keep your accounting in order. Remember to always reconcile your accounts to ensure that your financial records are up-to-date and accurate.


